A simple no-kneed bread recipe with long overnight rise
There was supposed to be a post before this that explains my recent absence from LWM but weebly and I are having some... issues with that one... and it's late, and I promised you bread so here it is.
Taking on a homemade pantry is an art of dedication, vigilance, and time management. When I first started working at the bakery, and we had very little money, I was probably the most committed to it that I've ever been. A couple of dollars any given week could mean the difference between overdrawing my account or not, so it was driven as much by necessity as it was my own interest and determination. But it was also a welcomed outlet and incredibly rewarding. When you take the time to make something right, food from scratch will always beat out something processed- in flavor, in texture, and in satisfaction. Well, as you could imagine, I wasn't making any bread at home when I was working for the bakery. I made bread all day in a kitchen with a big strong mixer, ample fine ingredients, and a massive steam injection oven. Today I'll take home and Asiago cheese loaf, on Monday a cranberry walnut... I was spoiled to death as far as bread was concerned. And when I stopped working for the bakery, I just about stopped eating bread. Nothing could compare! And bread from the grocery store? Stuff in bags? No. No no no. No thank you. That's not bread. If the crust is only noticeable by a slight change in color and the interior has no signs of air bubbles, I am not interested. And I was too lazy/busy/distraught? to be regularly baking my own loaves, so bread just started fading out of my life.
Taking on a homemade pantry is an art of dedication, vigilance, and time management. When I first started working at the bakery, and we had very little money, I was probably the most committed to it that I've ever been. A couple of dollars any given week could mean the difference between overdrawing my account or not, so it was driven as much by necessity as it was my own interest and determination. But it was also a welcomed outlet and incredibly rewarding. When you take the time to make something right, food from scratch will always beat out something processed- in flavor, in texture, and in satisfaction. Well, as you could imagine, I wasn't making any bread at home when I was working for the bakery. I made bread all day in a kitchen with a big strong mixer, ample fine ingredients, and a massive steam injection oven. Today I'll take home and Asiago cheese loaf, on Monday a cranberry walnut... I was spoiled to death as far as bread was concerned. And when I stopped working for the bakery, I just about stopped eating bread. Nothing could compare! And bread from the grocery store? Stuff in bags? No. No no no. No thank you. That's not bread. If the crust is only noticeable by a slight change in color and the interior has no signs of air bubbles, I am not interested. And I was too lazy/busy/distraught? to be regularly baking my own loaves, so bread just started fading out of my life.
That may have been for the better- bread isn't exactly a healthy staple. But it just couldn't last. I love bread. Passionately. I have found memories of my mom buying a fresh loaf from the bakery for dinner, and we'd be so tempted by the warm loaf that we'd tare off chunks of it and feast before we ever left the parking lot. A good loaf of bread is going to go fast and it should- they're always best in the first few days. But because of that, making your own bread regularly can be challenging for a lot of people to fit into their daily routine. Most breads (even sourdough once you get past the starter phase) are not difficult to make and don't require a great deal of attention, but they do require time and some planning. So for something you want to make frequently, it isn't always the most convenient of tasks. So, ladies and gentleman who have longed for fresh crusty bread to replace your store bought loaves but not had the time, energy, or commitment to make the switch, I present to you: The five minute (overnight) loaf.
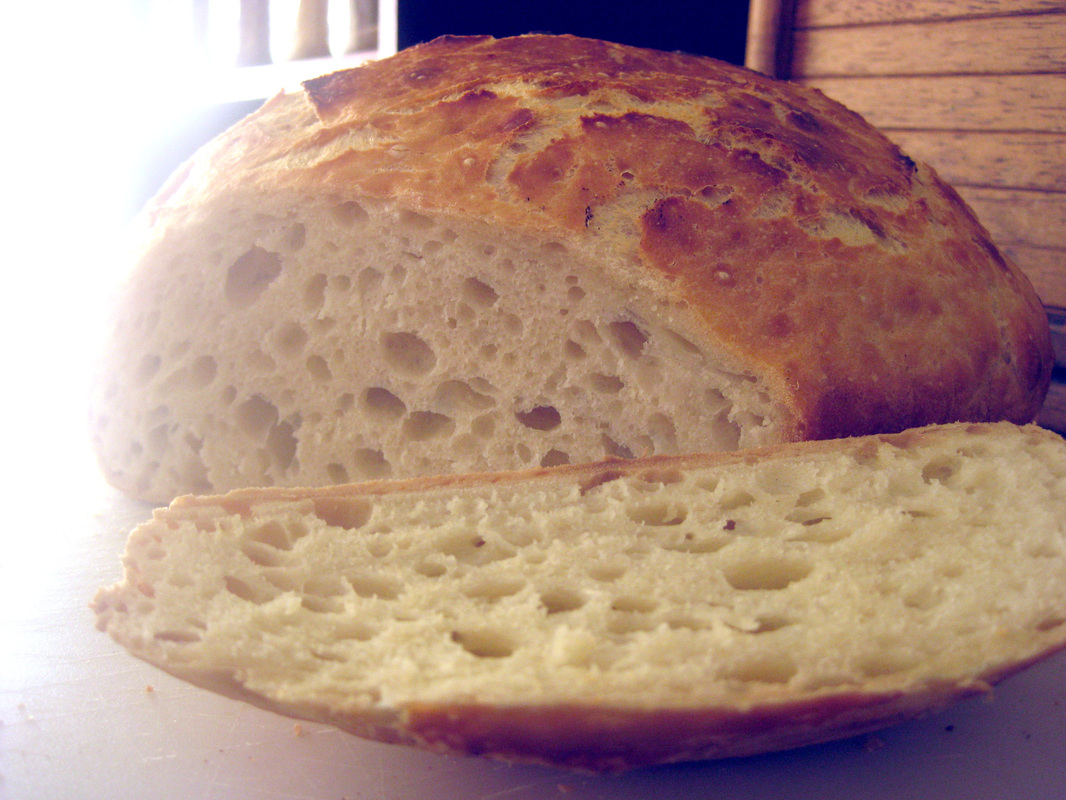
Here's the deal. This bread is made with a low yeast content. Yeast are what give bread it's rise. They eat up the wheat sugars and release gas (another fermentation process!), which aerates the dough. Gluten fibers are crucial in providing a support structure for these pockets of air. In most bread recipes you kneed the dough, stretching it and folding it to strengthen the gluten fibers. You use a lot more yeast so that the loaf will perk up quick, but the flavor resultant from using store-bought yeast isn't ideal. Sourdough breads have such excellent and complex flavor because they rely on natural yeast floating around in the air to colonize and ferment the flour. In this recipe, using less yeast means less impact on flavor. It also means that it takes the dough much longer to rise. But the really neat part is what all this time allows. By letting the yeast do their business very slowly, you're also letting them kneed the dough for you. The actual slow rise process in and of itself, stretches and strengthens the gluten fibers, along with the help of some enzymatic activity encouraged by the active yeast. This is the absolute easiest bread there is, and while it's no Rustic Loaf sourdough, the crust is crunchy, the crumb is airy, and the taste is pretty darn delicious.
(Based on a recipe from Jim Lahey)
(Based on a recipe from Jim Lahey)
THE FIVE MINUTE (OVERNIGHT) LOAF
Prep Time: 10 minutes
Rest Time: 12-15 hours
Bake Time: 40- 45 minutes
Yields: 1 very large loaf
INGREDIENTS
1/2 tsp active dry yeast. 1/2 tsp sugar, 3 cups very warm water
6 cups flour ( I like using 3 cups white, 2 cups rye, and 1 cup wheat), 1 TBS salt
INSTRUCTIONS
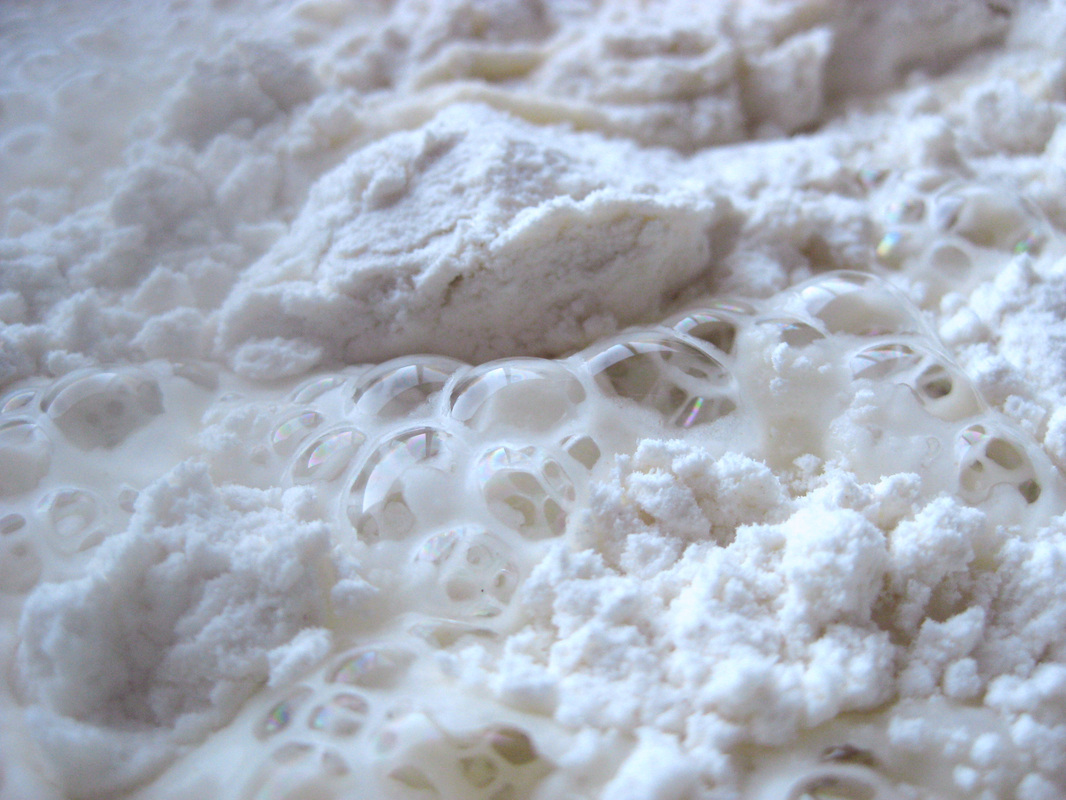
Whisk together the yeast and sugar in a small bowl. Add the water and whisk to combine. Let the yeast activate for about 5 minutes (you should see some bubbling at the top, but probably not as much as you are used to, as the yeast content is quite low relative to other breads).
Meanwhile, whisk the flour and the salt together. When the yeast mixture is ready, give it a quick stir and pout it into the flour mixture. Mix with a spatula (or a mixer with a dough hook, if you have one) to combine the ingredients. The dough will be quite wet and loose. Cover the bowl with plastic wrap and set it in a warm place to rise slowly, for 12-15 hours*
Place a dutch oven** on the center rack, and preheat your oven to 500 degrees. Get a peel (or wooden cutting board) dusted heavily with a flour and semolina or oat bran, if you have it. When the oven is ready, turn your dough onto and oiled surface
Oil your hands and a spatula or dough scraper (this dough is quite sticky). Using the spatula, fold one side of the dough towards the center, then repeat with the other four sides. This should tighten the amorphous dough blob into something more... morphorous . Then repeat this process with the "corners", pulling each into the center to provide a bit more structure . Working quickly with a well oiled spatula, transfer the dough, seam-side down, to the edge of the peel
Open the oven, carefully remove the lid to your dutch oven, and slide the loaf in
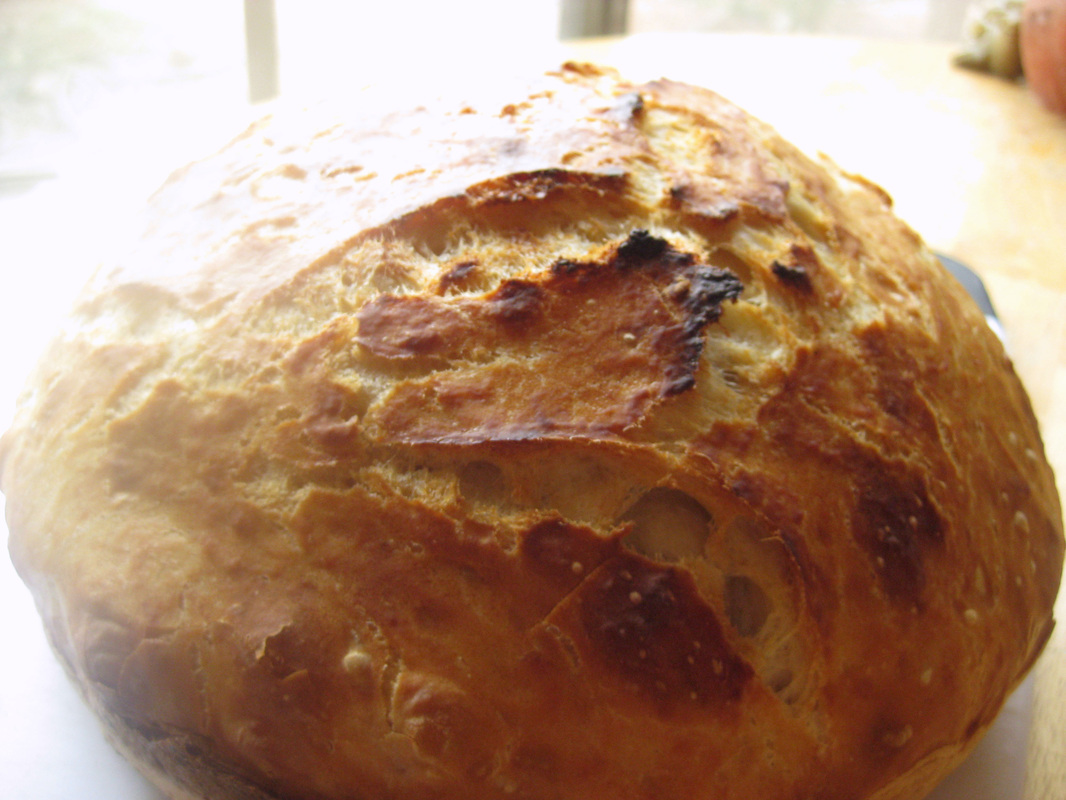
Re-cover and bake for about 30 minutes, until the loaf is just lightly golden
Remove the cover and cook for 10 - 15 minutes more, or until the color is well developed
When you turn out the loaf and tap the bottom, it should sound hollow
Remove the loaf from the dutch oven to cool
This part will be difficult, but let the loaf cool for at least 30 minutes before cutting into it- it's still cooking!
*I recommend this bread as an over-nighter. I prepare the dough just before or after dinner and in the morning, I do the bake.
**If you don't have a dutch oven, you can substitute with a cast iron pot, or even a deep-set cast iron pan, as long as the dough will fit! Just keep in mind that this will alter your cooking time significantly. Additionally, you may want to set some boiling water in a pan on the bottom rack of the oven when you put the loaf in. This will generate steam (which is what a covered dutch oven does as well), which is crucial to the formation of a crunchy crust!
Rest Time: 12-15 hours
Bake Time: 40- 45 minutes
Yields: 1 very large loaf
INGREDIENTS
1/2 tsp active dry yeast. 1/2 tsp sugar, 3 cups very warm water
6 cups flour ( I like using 3 cups white, 2 cups rye, and 1 cup wheat), 1 TBS salt
INSTRUCTIONS
Whisk together the yeast and sugar in a small bowl. Add the water and whisk to combine. Let the yeast activate for about 5 minutes (you should see some bubbling at the top, but probably not as much as you are used to, as the yeast content is quite low relative to other breads).
Meanwhile, whisk the flour and the salt together. When the yeast mixture is ready, give it a quick stir and pout it into the flour mixture. Mix with a spatula (or a mixer with a dough hook, if you have one) to combine the ingredients. The dough will be quite wet and loose. Cover the bowl with plastic wrap and set it in a warm place to rise slowly, for 12-15 hours*
Place a dutch oven** on the center rack, and preheat your oven to 500 degrees. Get a peel (or wooden cutting board) dusted heavily with a flour and semolina or oat bran, if you have it. When the oven is ready, turn your dough onto and oiled surface
Oil your hands and a spatula or dough scraper (this dough is quite sticky). Using the spatula, fold one side of the dough towards the center, then repeat with the other four sides. This should tighten the amorphous dough blob into something more... morphorous . Then repeat this process with the "corners", pulling each into the center to provide a bit more structure . Working quickly with a well oiled spatula, transfer the dough, seam-side down, to the edge of the peel
Open the oven, carefully remove the lid to your dutch oven, and slide the loaf in
Re-cover and bake for about 30 minutes, until the loaf is just lightly golden
Remove the cover and cook for 10 - 15 minutes more, or until the color is well developed
When you turn out the loaf and tap the bottom, it should sound hollow
Remove the loaf from the dutch oven to cool
This part will be difficult, but let the loaf cool for at least 30 minutes before cutting into it- it's still cooking!
*I recommend this bread as an over-nighter. I prepare the dough just before or after dinner and in the morning, I do the bake.
**If you don't have a dutch oven, you can substitute with a cast iron pot, or even a deep-set cast iron pan, as long as the dough will fit! Just keep in mind that this will alter your cooking time significantly. Additionally, you may want to set some boiling water in a pan on the bottom rack of the oven when you put the loaf in. This will generate steam (which is what a covered dutch oven does as well), which is crucial to the formation of a crunchy crust!


 RSS Feed
